Showing posts with label #sewingskivvies. Show all posts

Monday, August 19, 2013

Show Off Your Skivvies: The End (Finally!)

I am so pleased to announce that we are officially done with the Show Off Your Skivvies challenge. Yes, I know it was supposed to be over July 31st, and Ashley already did her wrap-up post, but what can I say? I like to take my time.

I really want to thank everyone that participated. It can be terribly scary showing off underwear (and even swimsuits!) on the internet, but I really think it's for a good cause. Not only are you potentially trying something new, making something better fitting, and making something that potentially saves you money, you're also showing it off for other sewers so they know if they want to make it, and to learn from mistakes you may have made - after all, isn't that why most of us have sewing blogs in the first place?

Another thing I was especially touched by was the number of people who wrote about their own body issues and explained why they were participating. Everyone has a story, everyone feels pressure to look a certain way, and while posing in my skivvies may not have cured everything, I feel much more confident about my body than I did when this started, and I hope everyone who participated feels the same way. Ashley and I hope to do this again next year so if you missed it or weren't totally ready to bare all, you have some time to get on board!

I also want to thank everyone who guest posted for this challenge. We learned so much, from how to find/make bras that properly fit to learning about the design process to learning how to make undies from our fabric scraps. Please check out the page with everyone's links and click around. There's so much information, and I just hope to add to it next year!

At the risk of sounding like a terrible Oscar winner who just goes on forever, I will wrap this up as the awful music just gets louder and louder. Below is everyone posing in their skivvies with links to their blogs. If I missed you, let me know and I'll add you to the group.

Thank you, everyone!


Teal Blue Bikini // Signora Aurora

Bombshell swimsuit
Bombshell Swimsuit // Very Purple Person

Kitty Hugs
Two Piece Swimsuit // Gjeometry
Green Bombshell // Kathy Sews

Two Piece Swimsuit // Young, Broke, and Fabulous

Finding/Making the Right Bra Size // Very Purple Person

Bombshell Swimsuit // Kathy Sews

And of course your hosts Ashley and I made many things as well!

Colette Nutmeg

Jasmine bra

Rosy Ladyshorts

French Knickers and Pajama Top

Amerson Undies

Ginger Swimsuit

Classic Bra

Thank you again for making and showing off your undies! I look forward to seeing some more next year!

Friday, August 16, 2013

Sewing Skivvies: Tips and Tricks to Sew a Swimsuit

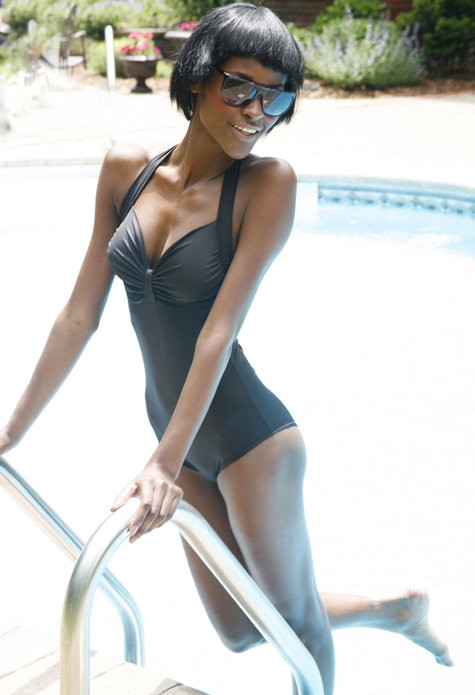
So, let's talk swimsuits. It's a little late in the season to make one, unless you're in another hemisphere or very motivated but because I've been getting this question a lot, I want to share what I've learned from making mine.

I am by no means an expert, so I'm not sure I'll be able to help you with any real issues, nor will this list be all inclusive, but here are a few little things I discovered.

First, swimsuit fabric is slippery. And it rolls. It can be very frustrating to work with. If you've worked with jersey before, you probably know what I'm talking about.

Elizabeth recommended sandwiching the fabric between tissue paper and ripping it away after you're finished - I think that's a brilliant idea and I wish I had thought of that.

Another issue I had that complicated things was lining up 4 layers (the 2 outsides and the 2 linings) and stitching together. Because it's so slippery, everything moved constantly. Basting the lining with the main parts would have been a great step to take.

I don't have a serger, and I really didn't think it would be a big deal to use a regular sewing machine - after all, isn't that what the zig-zag stitch is for? Alas, no. If you want a truly professional finish and don't have a serger, take the time to go over to someone's house and use their serger. Look at the photo below. I redid the middle seam with a zig-zag at home, and while the seam is sturdy, it's not nearly as flawless as the rest of the stitching.

Can you spot the non-serged seam?

I kind of thought people with surgers were being snobby when they said not to use a regular machine, but they were just being truthful.

(I would just like to note that yes, I did zig zag the elastic on and I would recommend that - my complaints here aren't with the zig zag stitch itself, but how you can see the thread when you use that type of stitch to seam together the pieces. I would also like to note that from a distance, you can't really tell so if you're not a huge perfectionist, you'll be fine.)

Okay, if you're not as lucky as me and you can't get your hands on a serger, all hope is not lost. Machines typically have an overlock or overedge stitch, but I really didn't like it with this fabric. I probably just needed to play with the tension, and that's not something I'm prepared to do.

However, the straight stretch stitch (see photo below) gives a really great stitch and I would use that instead UNLESS you're matching a pattern or  you tend to have to unpick a lot.

Photo found here
You see, the straight stretch stitch locks 3 times - forwards, backwards, and forwards again. That means if you need to rip out some seams, you better settle in for DAYS. (May I recommend basting or zig zagging first, then using this stitch over it?)

Here I quickly straight stretch stitched over the zig zag and I think it's much better, not as many "teeth."
To be honest, those are all of the things I would warn someone about when making swimsuits. If you've worked with knits and if you've worked with elastic AND you have access to a serger or the straight stretch stitch, you are ready. Go and make beautiful swimsuits.

(Though of course be sure that everything you're getting is waterproof and swimming pool-proof. I would recommend a nylon/spandex mix for the suit. Lining just needs to be a knit lining, and you can totally use the same fabric you used for the outside. The elastic needs to be rubber elastic or swimwear elastic.)

If you're not used to working with knits or elastic, just do a few practice rounds before starting.

For other resources, check out the many amazing links from the SwimAlong Project. They have pattern ideas and inspirations, places to shop online, and construction detail tutorials, like adding cups.

Still have questions or looking for something specific? Let me know and I'll try to help as much as I can, even if it means directing you to someone else. But give it a whirl - swimsuits do not have to be scary!

And if you have a tip that should be included or link to something great, let me know!

Tuesday, August 13, 2013

Sewing Skivvies: Ohhh Lulu's Ginger Swimsuit

Guess who's finally finished with the swimsuit!!


I am so in love with this suit. It's not perfect. Not even close, but I am ridiculously pleased with it and now I need to go to a beach immediately!

So if you remember from a month or more ago, I used Ohhh Lulu's Ginger Bodysuit, which you can buy here! I did have some issues assembling because I cut out the parts and discarded the paper BEFORE placing it all together. That might have been helpful. Luckily, I had an excellent sewing partner.

Unlucky for my sewing partner, though she somehow never complained, because she would arrange the pieces and I would feel a shudder of terror go through body as I would shriek, "No, no, do it again! This isn't right! See the stripes?! The stripes must match!!!" 

It was  a terribly dramatic time for me. Sorry, Ashley.


But anyway, stripes! My first time with stripes and they mostly match. There's a few pieces around the top that don't line up exactly, but I made it work and I'm so proud of myself.

I'm a little disappointed with the adjustments I wanted to make and didn't follow through with due to poor planning on my part. I wanted gathers under the bust but even though I cut the largest size for the chest (so I'd have plenty of extra to play with), it wasn't nearly enough and in fact, I ended up needing all of the fabric I cut for the top.

I also wanted to lower the sides on the bottom and add ruffles, but then I got tired and decided to scrap the idea. I still have some fabric for another pair of bottoms, but we shall see if I have the time or energy.

That being said, I am very pleased with how the pattern turned out sans the modifications I was thinking of making.

I was terrified that the bottoms were too revealing, despite having a higher waistline.

I was also annoyed that the back rides up (due to my larger rear) and I discussed jokingly about doing a full bum adjustment.

Not a bad idea to be honest, but once I tried on my old swimsuits for comparison, I realized they all rode up in the back and I had just never noticed. Furthermore, they were actually much more revealing on the bum.

Weird how you only notice those things once you're sewing!


Another thing I'd love to work on with my full bum adjustment is the saggy part in the back. It's actually not as noticeable with this swimsuit (especially compared with my RTW swimwear), but it's something I always have to deal with and if I'm making bottoms myself there must be a way to do away with it.

(Or is that one of those things that's totally normal and once again I missed the boat because I was over in the corner being self-conscious?)


Can we pause for a moment and talk my hair? I wanted to do an old time-y photo shoot  because the stripes just scream retro to me (and completely forgot to bring the rest of my props on the roof!) but this hair-do with the victory rolls is so easy and I felt so gorgeous and also like a siren. I told my boyfriend I wanted to go out and call men to their deaths and he just laughed.

I was so serious.


Okay so back to the swimsuit. 

I'm going to compile a tip sheet for swimsuits with links to people who know much more about swimsuit sewing than I do. (Edit: Tips here!) But I was so surprised at how difficult it was. I like knits. I think sewing with knits are fun.

But this was not fun.


Maybe it's been too many months since I actually worked with knits but this fabric rolls like crazy. And the trying to get the stripes lined up was insane.

Perhaps if I had basted the lining to the main part instead of trying to serge all 4 layers together at once while lining up the stripes.

But why would I do anything to make my life easier? ;-) It worked out in the end.


Everyone wants to know about how concerned I am with the white stripes on the swimsuit. I'm not at all. It's fully lined and I carefully laid out the pattern pieces so that not only would the stripes match but the green parts covered all my bits. So I am 100% okay with jumping into a body of water.

A lot of people having been making a lot of awesome swimsuits this summer, and every single one of them says that they love how they feel and they want to wear it out. While I'm glad everyone's feeling some self-esteem, I may have scoffed a bit because it seems a bit ridiculous to feel amazing in swimsuit but actually, it's true.

I feel incredible in this suit. I don't feel self-conscious at all. I think making your own suit is perfect because you have so much control over it, from the pattern to the fabric to even how tight you like your elastic. And it's a million times cheaper than paying $150+ for a nice one.

So yes. Everyone go make swimsuits!


And, ahem, that officially concludes the Show Off Your Skivvies challenge on my end... only 13 days late. Not too shabby. I'll compile a list of links for those looking for resources for the own swimsuits, and I'll have a final round-up post.

Next up: probably a dress.

Wednesday, July 31, 2013

Sewing Skivvies Update: No Swimsuit Yet. Womp, womp.

Ahem, so today is officially the last day of the Show Off Your Skivvies Challenge... and I'm not done with my Ohhh Lulu swimsuit yet, eek!


But look, I'm working on it! And I'm matching stripes! And I don't get along with elastic so I had to re-do a lot of it. (But check out my awesome seams from Ashley's serger. Oh yeah.)

This weekend. This weekend for sure! Hopefully.

In other skivvy news, be sure to check out the guest post Mrs. Depew aka Anna from A Few Threads Loose on vintage underwear. She also gave us a coupon code for 15% off patterns in her store until the end of August!

And also, today's the last day to use Ohhh Lulu's coupon code for her etsy shop. The ginger pattern that I'm working isn't currently available as Sarah's updating it, but she has plenty of other great patterns!

If you're disappointed by the lack of skivvies on this blog today (I know, so am I), check out Ashley's blog. She made the Colette Nutmeg and the Rosy Lady shorts!

In non-skivvy news, I feel like I'm getting swamped with projects. Besides skivvies, I STILL need to finish curtains for the bedroom, make a copycat dress or two (luckily I know exactly what I want to make), make cute things for a friend who just adopted an adorable baby boy, and maybe make a summer dress since I haven't done that yet and summer's almost gone!

Definitely feeling overwhelmed, but the swimsuit comes first. Anyone else still making skivvies?
Ohhh Lulu Ginger Bikini Polka-Dot Bikini Green Bombshell Amerson Undies Giraffe Bikini Classic Bra Jasmine Bra Grace + Jasmine Bikini Bombshell Swimsuit On Vintage Lingerie Colette Nutmeg French Knickers Finding the Right Bra Size Rosy Ladyshorts Bombshell Swimsuit Teal Blue Bikini Image Map

Monday, July 29, 2013

Sewing Skivvies: Mrs. Depew Talks Vintage Lingerie + A Coupon Code for Her Shop!

Today I'm so pleased to introduce the lovely Anna aka Mrs. Depew from A Few Threads Loose, who also runs the etsy shop Mrs. Depew Vintage Patterns & Notions. Anna loves vintage patterns, and recreates and redesigns them in larger sizes, with new instructions, and plenty of online sewing support. 

I'm so happy she agreed to do a guest post today on vintage lingerie, despite just moving halfway across the world, because vintage lingerie is something I've always admired, but wasn't so sure was attainable in every day life. But I was so wrong - in fact, I think it might be a solution to the underwire problem (i.e. never finding the right underwire size!) that seems to plague home-sewers (or maybe just me). Also, Anna was kind of enough to give a coupon code for her etsy shop - read on!

There are so many different reasons that the average home seamstress has for trying her hand at sewing her own lingerie. As someone who blogs abut sewing lingerie quite often, I have heard everything including "Store-bought bras just don's seem to fit me right," and "I'm tired of seeing the same 10 bras in every store I go to," or "I'm too busty for the bras sold in stores," and quite often "I'm allergic to latex and can't seem to find bras without elastic," etc. 
 These are all great reasons to sew one's own lingerie but my reason is a bit different. From some injury I don't remember having years ago, (there have been a few, I'm super accident prone) I have a small knot of scar tissue on two of my ribs, and unfortunately, it just happens to be right where the edge of most bras sit. It's also exactly where an underwire rests and wearing most bras causes me an intolerable amount of pain. I can pull off an underwire for maybe 2 hours before I break down and take it off, and many other bras last me about 4 hours before I give up on them. 
So almost as soon as I learned to sew, I was attempting to make my own bras; looking for the perfect design that would be comfortable enough to pull off. But what led me to using vintage patterns? A lot of it had to do with the fact that my mother (an antique dealer and seamstress of epic talent levels) sent me a box full of patterns and right at the top was a 1940's bra pattern. 
I'm the one in the giant hat.
A lot had to do with the fact that I grew up in an antique shop and have always felt just a little bit more comfortable in vintage, but most of it had to do with the fact that most vintage bras are (in my modest opinion) just so much prettier and more feminine than modern bras. And it doesn't hurt that I have yet to find a vintage lingerie pattern that calls for an underwire! 
It took me several tries to figure out that my particular style (and small bust) were best suited to 1920's - 1930's bras which seemed to have the most natural bust shape for me. I love the clean, basic lines of a 1920's bra, they are so easy to sew and they work under almost any clothing.

1930's bras turned out to be just as great, looking a bit more modern and having a more fitted look. This one came from a 1930's German pattern magazine.
The best discovery I made was a vintage bra back closure made from elastic and hooks that allowed me to make a great fitted bra and still have a little bit of give and stretch to give my ribs a break. (You can see a tutorial for sewing one here.
I enjoyed sewing my own bras and other lingerie so much that I eventually added a few vintage inspired and vintage reproduction patterns to my pattern line over at Mrs. Depew Vintage. I now have different bra patterns (and other lingerie patterns) all from different eras and different sizes to accommodate as many needs as possible. 
1940 French bra
With vintage pin-up looks coming back into vogue (thanks in no small part to the lovely Dita Von Teese) you'd be surprised how many women have decided to add lingerie sewing to their to-do list. If you give it a try, you won't be alone. Blogs and forums are popping up one by one as many of us decide to share our failures and successes with others. The thing that many who are new to lingerie sewing learn is that it's not as hard as it sounds, and many find that some vintage patterns are even easier to sew. 
If you'd like to give sewing a vintage inspired lingerie pattern a try, please feel free to use coupon code "SEWINSKIVVIES" for 15% off any pattern (there's no limit) in my Etsy shop until August 31, 2013. 
And please stop by A Few Threads Loose and share your lingerie sewing experiences with me! 
Best of luck to all of you who decide to give lingerie sewing a go. I hope that you find it to be as enjoyable and rewarding as I have. 
Happy Sewing!
Doesn't she make bra sewing sound so fun and easy? Go check out Anna's blog and shop pronto! She has a resource page for lingerie sewing techniques and she does frequent sew alongs so you always have something to refer to when making her patterns! Also, her shop has some great patterns, and not all of it is lingerie either. Though I think I'm going to start with this 1950s Pin-Up Kit. So fun!

Wednesday, July 24, 2013

Sewing Skivvies: Mary from Young, Broke, and Fabulous on Sewing her Amazing Swimsuit

I am so pleased to announce that Mary from Young, Broke, and Fabulous is doing a guest post today. I haven't been following Mary for very long - her wonderful outfits kept popping up in the MMM flickr group and every day I resisted for some unknown reason, but then it turns out that she went (goes?) to my alma mater so I knew it was meant to be. 

And it was meant to be! She makes the most adorable vintage-inspired clothing, like this sailor skirt and top, this Leanne Marshall dress with trees! and birds!, and this beautiful version of the Colette Licorice. But don't think Mary is all about the vintage inspired dresses. She made a pin-up Robin cosplay outfit, she's making a quilt out of Nightshade fabric, she made a Colette dress out of Victorian gothic fabric, and, in case you haven't recognized her quite yet, she competed in the Super Online Sewing Match. This girl is on fire! Of course, as this is part of the Show Off Your Skivvies Challenge, I asked Mary to talk a bit about her (adorable) swimsuit and how she made it.


Hey there, skivvy folks! A couple of weeks ago, Kristin asked if I would be interested in writing a guest post about my me-made swimsuit, and I heartily agreed. This is actually my first-ever guest blog post, so please bear with any awkwardness. -_- 
So I guess I fall into the "big girl" category of seamstresses, though I don't particularly feel "big". My apparent fatness, however, is part of why swimwear and I have had a rocky relationship over the years. Last month, I made myself my very first me-made swimsuit for a trip to the beach. I was really excited to go about doing this because swimsuit shopping has always been a fairly traumatic experience for me. The last time I went to a store and bought one, I literally ended up crying in the dressing room. It was always an awful scavenger hunt looking for something that was comfortable, well-fitting, supportive, aesthetically pleasing, affordable, and that I didn't feel too self-conscious in. I always, always had to settle. 
If I found something supportive, if was always a halter-top that killed my neck (36G breasts are downright painful when mixed with a halter-top). If I found something in a color and style that I liked, it wasn't available in my size. Everything was at least somewhat uncomfortable given that my thighs chafe horribly and finding a women's swimsuit that covers my thighs and that I actually like is high near impossible. Even if I found something that suited my bare bones necessities in a swimsuit, it always cost me at least $100. Trust me, there was a reason that I very rarely went swimming or to the beach. 
Sewing's changed all that. A while back, a friend of mine had commissioned me to make her a ballroom dress that was basically a leotard with a Grecian style drape over top. I used Ohhh Lulu's Ginger bodysuit pattern for the leotard, and that was essentially my first venture into swimwear-esque apparel. When I decided that I wanted to make my own swimsuit, I chose to use the bra-top separate version of the Ginger pattern for my bikini top. 
Deciding on the bottoms was trickier, but then it occurred to me to use the new Megan Nielsen Tania culottes pattern for the bottoms. I made up a test version in a knit and I was pleased to discover that they actually looked like a circle skirt, rather than "dorky shorts" (as Megan herself said on the subject). 

Last month, I ordered up some nylon spandex from The Fabric Fairy and some swimsuit lining for the the bikini top from Hancock's. The culottes part was an easy sew. 
My main alterations were eliminating the seam allowances of the waistband to account for the knit fabric (the pattern was created with wovens in mind) and created a dart in the back waistband to prevent gaping (I have a small waist in comparison to my large hips). I cut off the inside part of the dart once I sewed it, and then finished the new raw edge, essentially creating a seam in the back waistband. 

The top was a little trickier. I wasn't sure what I was going to do for the cups since premade cups in my size virtually don't exist for home sewists and swimsuit cup foam cost more than I could afford. I ended up harvesting the cups from an old bra that I had that was falling apart. I probably should have done an FBA for the top, but I wasn't entirely sure how to go about it with the Ginger pattern. 
The top ended up fitting well enough, though I'm a little wary of spillage when I wear it near my period (my boobs grow like half a cup size during that time of the month). Like I said earlier, I'm a G cup, so women below that size shouldn't have a problem sewing the Ginger top without an FBA. 

I still need to practice sewing that place where the cups and lower bodice come together because I can never seem to get it right. It's the one place where the fabric stretches to the point of distorting the print a bit. 

I'm also a little iffy about my strap casings, but that's mostly personal laziness. I made the casings before I really knew what I wanted to do with the straps. I found this elastic in my stash that's really strong and seems to be chlorine safe and turned out to be perfect for the straps, though not as wide as my casings. I didn't feel like turning them inside out and re-sewing them again, so... Yeah. I just have to deal with the loose casings twisting a bit over the course of wearing the swimsuit. 

Everything else on the top sewed together well and I didn't have any problems finishing it with the elastic. Fitting in the underbust elastic for extra support was a little tricky, but that had more to do with my stubborn sewing machine giving me grief. I'm glad I put forth the effort to add the elastic because it really does give a nice amount of additional support. 
So now the body issues stuff. Believe me, I am no stranger to body insecurity. I've never been what society would consider to be a "skinny" girl, but I've never been what I consider to be "fat". I've always been at this in between size that caused me lots of frustration before I started sewing. I was too big for stores that sold stuff for my age group (like Forever 21), but plus-size stores carried clothes that were too big for me or I just plain didn't like. 
My upper thighs have always been an area on contention because as I said before, I chafe horribly there. Short shorts and pretty much all commercially available swimsuits are all terribly uncomfortable for me. I have a bunch of biking shorts and whatnot that I wear under my skirts and dresses in my quest to prevent chafing. 
Once I made this swimsuit, I was excited to finally have swimwear that i could wear out and about without having to worry about being in pain the entire time. A bitchy "friend" of mine told me upon seeing it, "You know that your swim bottoms are practically capris, right?" I kind of wanted to smack her. All the other feedback I got regarding my swimsuit was overwhelmingly positive. 
Let's talk about these pictures, shall we? 

I'm continually amazed by what sewing has done for my self-confidence. If someone had told me last year that I would be swing dancing in front of other people in a swimsuit a year later and then posting the pictures on the internet, I would have laughed at them. Because of my ability to make my own clothes, I feel better about my body now as a 190ish pound 22 year old (the "biggest" I've ever been) than I did as a 150 pound 17 year old (the "smallest" I've ever been as an adult-like creature). 
I look into the mirror and I'm happy, and I think a large part of that is because my personal style and image is no longer limited by what the fashion industry deems appropriate for me. I can literally wear whatever the hell I want. If I want purple scalloped shorts and a dinosaur print top, then I can damn well make and have them. Pretty stylish clothes are available to me in ways they weren't back when I could only find them in "small" sizes. It's a lot easier to be body positive in relation to yourself when you're able to dress yourself in a way that makes you happy. 
But yes, back to the pictures. This was at a lindy exchange in South Carolina (kind of like a swing dance convention) and on the last day we had a cook-out and a slip and slide. I didn't actually take part in the slip and slide, but I did wear my swimsuit (like most of the other attendees). After all, it was like 90ºF outside. I admit, I was a little nervous taking off my cover up top, but once I did, I got so, so many compliments. 
The culottes looked kind of awesome dancing, and the top was plenty supportive, despite the bouncy dancing. I got tons of commission inquiries and compliments from attractive members of the opposite sex and for the first time ever, I felt hot in a swimsuit (and I'm not just talking about the weather). 
So I guess the point of what I'm saying is that if you don't like swimwear and don't feel confident wearing it, then make your swimsuit yourself. I was able to show off my favorite parts of my body and hide the parts that I don't particularly like. I was able to address all the issues I have with commercial swimsuits (chafing and neck pain) and actually choose my swimsuit's print and color, rather than settling for what fit. 

 
Ok, so how do I end this thing? *awkward silence* 
Here, have a bucket of sloths.  
Seriously, go check out Mary's blog already!

Monday, July 15, 2013

Sewing Skivvies: Tutorial from Naomi at One Avian Daemon on Drafting Underwear!

Whenever I see someone take the Seamless Pledge, a pledge where they will only make their own clothing OR buy used from a second hand or vintage store, most people include a clause that they plan on continuing to buy their underwear. I've unofficially taken the pledge and stuck with it for 2.5 years, though mine started because I was poor, and I too had an unwritten clause about buying underwear. But why? Why does underwear seem so mystical to us?

I made my first bra, which was ridiculously easy and still so, so comfortable. For real, I actually wore it all weekend rather than going bra-less, mostly because I forgot I was wearing it. And remember how I was all sad and felt strange about it flattening out my chest? Apparently this is normal, and I had no idea. None. (Too many fake chests on TV maybe?) Your comments and support amaze me, and I am so encouraged to continue making more bras. I may delve into a push-up bra at some point so I can have the stereotypical look for certain occasions, but right now I think I want to continue being comfortable and I'm going to make another Jasmine in skin-tone.

So what about underwear? That seems the next natural progression and it even seems easier than bra making. The underwear I buy doesn't always fit right. It's too loose, too tight, or it rides up so I should definitely make my own, but I've been a bit nervous to try. Ashley experimented with some Amerson undies and found they were too small all-over, including the crotch!

I asked Naomi from One Avian Daemon to do a tutorial about making underwear. If you haven't heard of her, definitely check out her blog. She makes beautiful self-drafted clothing and usually includes tutorials so you can easily achieve the same look!

Naomi in a gorgeous shirt she made from a tablecloth with sentimental value.
Naomi is a self-taught seamstress who sells her clothing on etsy and in boutiques in the San Francisco area. Last week I linked to her 7 part series on how to draft your own swimsuit, and today she's teaching us to draft our underwear! On her blog she's written about using fabric scraps for underwear, but this tutorial has more details on the fabric and finishing technique - perfect!

Making underwear is fun and easy! It doesn't take much fabric, so you can use left over scraps or buy expensive silk you wouldn't be able to afford in larger quantities. Almost any fabric will do: stretchy jersey is easiest, but you can use a woven fabric if you make it a bit bigger than you are and gather it in with elastic at the waist and leg holes. The liner should be cotton or jersey (a stretchy knit fabric), preferably both.  

IMG_5811 (2)
To make underwear in my size (small), I usually use about 1/4 yard of fabric and 2 yards of elastic. Larger sizes will need a little more fabric and a lot more elastic. I've written in the past about the pattern I like to use for underwear, but if you like a different style it's easy to make your own pattern. 
Just pick out some undies you like and trace them onto a piece of newspaper or other large paper. This is easiest if they're worn out and you don't mind cutting them up - then you can just cut along the seams, but even if you don't want to do that you can trace the back easily, and the front by carefully folding and scrunching up the back so you can see the leg holes. Remember to add in seam allowance, particularly along any seams where you're going to use elastic. 
Once you've sewn together your undies you have to finish the edges. The most fun way to do this is with decorative lingerie elastic. To use it, sew the elastic to the fabric with the right sides facing each other (as if you were making an ordinary seam) using a slight zig zag stitch. Then fold the elastic under, and top stitch using a wider zig zag. 
You can also finish the edges using regular 1/8 inch elastic. Sew the elastic to the wrong side of the fabric at the edge of the leg hole, using an 1/8 inch zig zag stitch, beginning at the crotch seam. Hold the elastic tight, but don't stretch it. When you've gone all the way around the leg hole and reach where you started, cut off the extra elastic. Fold the edge of the leg hole over so the fabric warps over the elastic. Fold again. Sew down this folded edge with an 1/8 inch zig zag, stretching the fabric and elastic slightly as you sew. 
A third option is not to use elastic at all. I like this for underwear I'm going to wear with tight jeans, because it doesn't leave any elastic lines. But it also means there's nothing to hold the edges of the underwear in place (besides your pants), so it doesn't work well at all for underwear you're going to wear with dresses. If you have a serger, it looks nice to finish the edges with a lingerie hem stitch. But if you don't you can just fold the edges over like a regular hem.

Naomi makes it look so easy and beautiful! I'm especially intrigued by the lack of elastic - I may have to sew a couple different types of underwear this week! Have you made underwear before?

Monday, July 8, 2013

Patterns: Swimsuit Time!

This weekend was supposed to be a great time of relaxation and sewing because I had a 4 day weekend. Alas, it was not meant to be as my freelancing job called me up and needed gobs of work done. Well, it ended up being gobs of work because I didn't do anything Wednesday or Thursday. It backed up pretty quickly.

Last weekend I started working on the Jasmine bra from Ohhh Lulu (PS- did you read the interview with her? Get the coupon code?), and I'm almost done! I just need to attach the straps and I'll be able to wear my very own handmade bra. That's easier said than done, of course, as I need to find the time. Hopefully I'll have it finished in the next few days. I can't wait to show you because I am so excited about it! Spoiler: It's amazingly comfortable - so far.

Remember my contest? Congrats go out to Cait from Cait {Makes} Things  on winning the contest. Can't wait to see some skivvies!

Over the weekend, Ashley posted Sew Free: Skivvy Edition, a round-up of some free patterns, including undies, swimwear, robes, PJs, and slips. Check it out for some great options if you need more skivvies in your life - and really, who doesn't?

So in addition to the bra I haven't completed, I still haven't started my swimsuit! I wanted it done and on the beach this past weekend, but it was not meant to be. If you've been slacking like I have, here are some of my favorite swimsuits that I've spotted floating around. Some free, some self-drafted, and some that'll cost you.

Ohhh Lulu The Ginger Body Suit and Separates PDF Sewing Pattern
Ginger Bodysuit & Separates
First up is the one I'm making! It's the Ginger bodysuit, and I'm making the 2 piece, probably with more ruffles.


Grace and Jasmine bikini
But really, you can turn any of Ohhh Lulu's patterns into a swimsuit! Check out Sarah's post here on turning the Jasmine Bra and the Grace Panties into a swimsuit. (And, ahem, did I mention 15% off - get the coupon code!)

7579212dd096b5add3293957d04638e1191851c7_original_large
Alison swimsuit
I'm more than a little in love with the Alison swimsuit, which I thought about making and probably will some day.


Bombshell swimsuit / bathing suit PDF Pattern. Vintage style. 3 variations: halter, maillot, high waist bikini
Bombshell Swimsuit
Of course, there's the Bombshell swimsuit that everyone's making. I love it, but it's almost identical to the one I currently own (that doesn't fit me well, argh) so I'm skipping it this year. Maybe next year!


Bow Tie Bikini
This one's a freebie! I love the bow-ties. I may need to incorporate those into mine. Hm...


Basic Swimsuit
Ralph Pink has some basic swimsuit options - the coolest thing about his website is that you can enter your measurements and the pattern adjusts accordingly. I haven't tried it, but it sounds incredible!


Wednesday Swimsuit
If you want to channel Wednesday Adams, check out this swimsuit I found on Kollabora! Another swimsuit I want to make, Kanin said she based the pattern off a tank top and some bloomers. Amazing!

Naomi from One Avian Daemon has a 7 part series on how to draft your own swimsuit, whether it's a bikini or one piece. Check out the series if you don't like your options!

I hope you're inspired, and I hope to have a swimsuit to show you next week - finally! Let me know if you have any favorites I left off.